Replace your wheel bearings man, your wheels don’t even roll! Because we recently went over tire changing in the past few posts, why not talk about wheel bearings while you’re here, right?
Wheel bearings are an important part of your bike and are often neglected. Wheel bearings get worn out quickly, especially if you pressure wash your bike. It’s not hard to replace wheel bearings provided you have the tools and the know how.
One of the important wheel bearing tools is a bearing puller, these will help remove the bearing without any struggle. DON’T USE A SCREW DRIVER TO BEAT THEM OUT OF THE HUB!
Motion pro makes a good wheel bearing removal kit, they are fair priced as well:
Another thing that works is a normal blind bearing removal kit, commonly used in the automotive trade, one of these can be handy for numerous bearing jobs on your bike.
Some wheel hubs may use a snap ring, or a retainer ring to lock the bearing into the hub, be sure to check around the bearing for any thing that could restrict it from coming out of the hub. There are a few variations of wheel bearing retaining rings, make sure you are buying the one sized to match your make and model. **DO NOT ATTEMPT TO REMOVE A RETAINING RING WITH A PUNCH AND HAMMER!
Not all hubs are the same, or use the same bearings, seals, or spacers. Make sure you buy a kit that matches your year, make and model. **If you have an aftermarket hub its a good idea to check with the manufacturer to see what bearing is used in your hub.
There are several companies that offer bearing and seal kits, All Balls, and Pivot Works are among some of the most popular. Most of these kits are made up of OEM or equivalent bearings and seals. In fact, there are only a few major manufactures of bearings…the only real difference will be the packaging. The bearings and seals will contain the same numbers as one another that reference there size and type, but we will get into that in another post.
Ok your ready to get them out of there, lets move on.
1st, Remove the seal you can do this with a wider tip flat blade screw driver or a small pry bar and just work your way around the seal turning the handle of the tool left and right and the seal will rock right out of the hub, do this on both sides of the hub. AFTER THE SEAL IS OUT CHECK BOTH SIDES OF THE HUB FOR ANY RETAINING RING OR CLIPS THAT MAY NEED TO BE REMOVED PRIOR TO BEARING REMOVAL AS MENTIONED ABOVE!
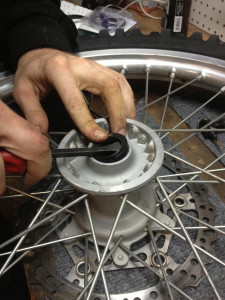
2nd, grab your bearing remover tool, as mentioned above and install it into the bearing. I use an automotive bearing remover, and i don’t use the slide hammer, I use a punch (Broken 3/8in extension) to drive the bearing out.
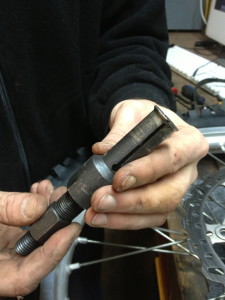
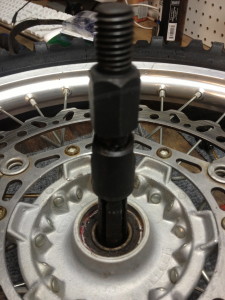
Install the Bearing remover and expand it to fit the bearing, the lip at the end of the tool should set right where the bearing ends and the spacer starts.
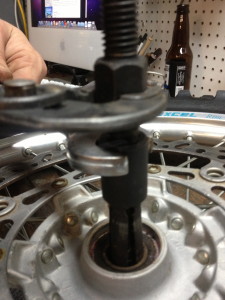
3. Tighten it up so that its firmly grabbing the bearing. If using a slide hammer, thread it on to the bearing remover tool and hold the wheel on a surface and use the slide hammer to chase the bearing out. If you are using a punch…flip the wheel over and place a punch into the hub so that it rests against your bearing puller jaws. You will want to rest the wheel with the hub itself on the edge of a bench. You can also support it with blocks. Take care not to rest it on a sprocket or brake rotor.
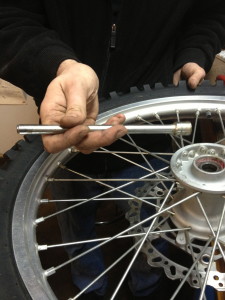
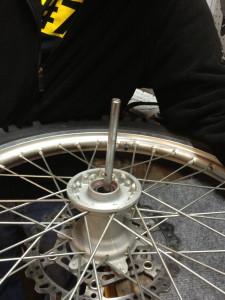
4. Tap the bearing out lightly using your punch and a hammer.
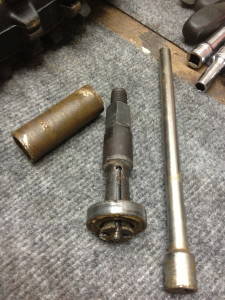
The bearing and the spacer will fall right out.
5. Flip the wheel back over reinstall the bearing remover, and repeat the steps to remove the last bearing.
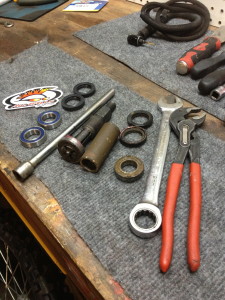
Now you will want to take the time to clean up parts like the spacer and the inside of the hub, you can use some brake cleaner, a rag, and a scotch bright pad to clean them off.
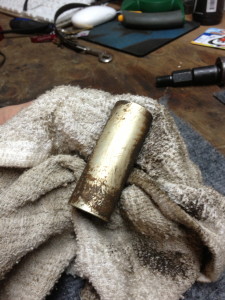
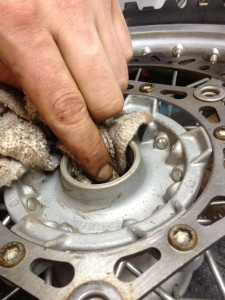
Reinstalling your new wheel bearing into your dirt bike wheel hub.
1. Install 1 bearing into 1 side of the hub, we use a socket that is just smaller than the outside diameter of the bearing, but there are actual tools that can ease the install, or impress your girlfriend (more like piss off your wife with unnecessary tool purchases) check them out here:
There are a couple of styles, this one shown is a driver style, there are also some that are a threaded rod, and a set of washers that you use a wrench to pull the bearings together into the hub.
We will just tap them in with a socket.
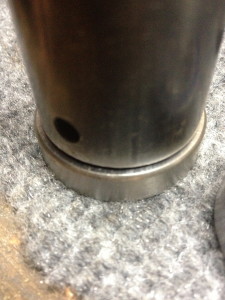
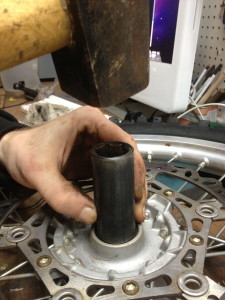
Now ONE bearing is installed NOTE THAT THE BEARING IS A SEALED BEARING AND DOES NOT NEED TO BE GREASED. make sure you set and drive the bearing strait into the hub DO NOT FORCE IT. you can freeze your bearings or put some wheel bearing grease on them to help the install.
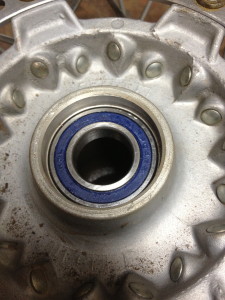
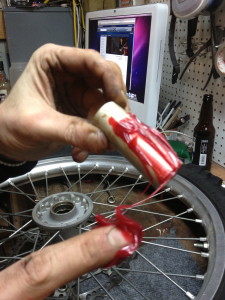
2. Flip the wheel back over, GREASE the spacer to help reduce friction, collect the dirt away from the bearing, and help the axle reinstall smoothly.
Drop the spacer into the hub, it will rest against the bearing you have already installed.
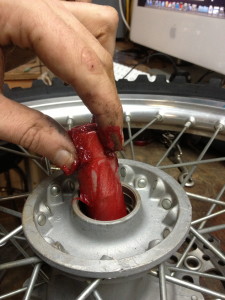
3. Install the last bearing the same way as outlined in the 1st step of installation.
4. Install the dust seals into the hub the same way you installed the bearing, Just tap them in lightly. Don’t force them in, In some cases you can just press them in with your fingers! It is a good idea to grease the bearings to keep from damaging them during installation as well as to help keep dust and moisture away from the bearing itself. It helps also to reduce friction from the wheel spacers.
5. Wipe away any excess grease, install wheel…go ride!
Plan removal and installation as separate jobs
The removal set and bearing driver do different jobs. Check the hub layout, both bearing diameters and the required adapters before buying either. Coverage of the remover does not establish coverage of the installer. These current selections follow the restored 2013 article; use current motorcycle and tool instructions for the actual procedure. Check whether your actual hub uses a plier-operated retaining ring before adding snap-ring pliers; the correct ring tool serves a different job from the bearing remover and driver.
Affiliate disclosure: As an Amazon Associate I earn from qualifying purchases. These Amazon links are paid links. How our links work.
Motion Pro Metric Wheel Bearing Remover Set
An eight-piece removal set with large and small drivers plus 10, 12, 15, 17, 20 and 25 mm removers. This is a removal tool, not a replacement bearing-and-seal kit.
Before you buy: Confirm the bearing bore and hub arrangement, including any retaining ring. Use only the correctly sized remover and the current Motion Pro and motorcycle instructions; the listed sizes do not cover every hub.
View on Amazon (paid link) — Motion Pro Metric Wheel Bearing Remover Set, 08-0269Manufacturer details · 08-0269Motion Pro Bearing Driver Set · 08-0551
A bearing installation set, separate from the removal tool. Motion Pro specifies coverage for 12–25 mm inside diameters and 32–47 mm outside diameters.
Before you buy: Match both bearing diameters, the required adapter and hub access to the current tool and motorcycle instructions. Range endpoints do not establish fit for every bearing combination. A remover fitting your bearing does not prove this installer fits it. Bearings, seals and hub-specific retaining tools are separate.
View on Amazon (paid link) — Motion Pro Bearing Driver Set · 08-0551, 08-0551Manufacturer details · 08-0551Motion Pro Snap Ring Pliers
Motion Pro lists four interchangeable tip sets for internal and external combinations, with a stated effective range of 10–50 mm.
Before you buy: Identify the actual retaining-ring style, diameter, tip-hole size and access in your hub before selecting this tool. Not every bearing retainer is a plier-operated snap ring. Match the tips and configuration, follow the motorcycle and tool instructions, and replace retainers when specified. This is not a bearing puller or driver.
View on Amazon (paid link) — Motion Pro Snap Ring Pliers, 08-0186Manufacturer details · 08-0186This current product selection is separate from the restored 2013 article. Its original procedure and product claims retain their original date. No new hands-on testing is claimed. Confirm the bearing bore, hub layout and retaining hardware, and use the current tool and motorcycle instructions. Confirm package contents, seller and current price before buying.